Wool Duck Ornament by Jen

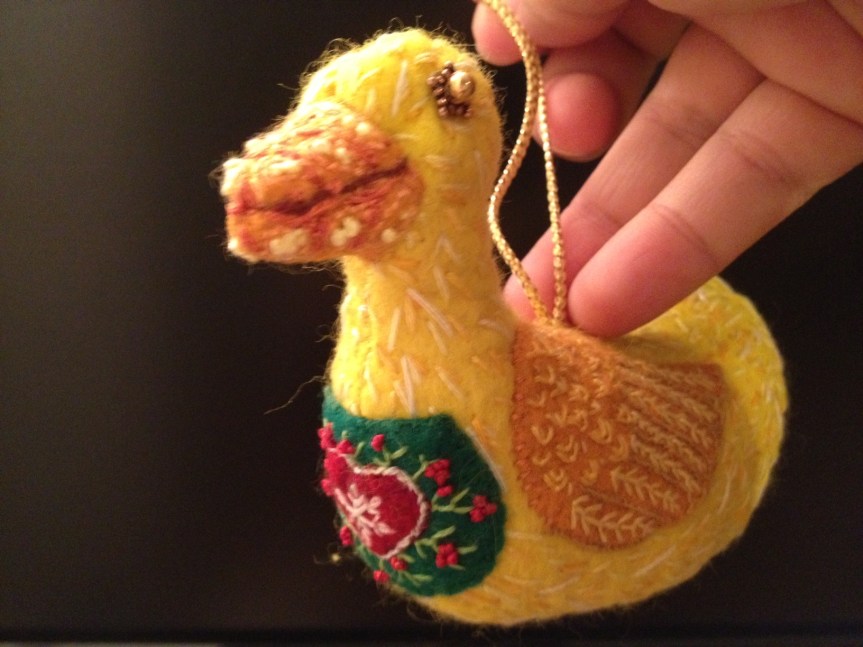
My friend Jen just sent me photos of this adorable duck ornament she made for her child’s teacher.

Wool Duck Ornament by Jen

I asked Jen to tell me about her process:

“Sure!  I made it from this pattern http://noseynest.blogspot.com/2008/06/lucky-ducky-freebie.html but I turned it inside out to hide the seams.  I like the look of hidden seams better, but it made his head so small!  Wasn’t thinking about that when I changed it though.  It’s just on regular wool felt, and before sewing it together I used embroidery thread to stitch on the decorative stitches.

Detail of Wing on Wool Duck Ornament

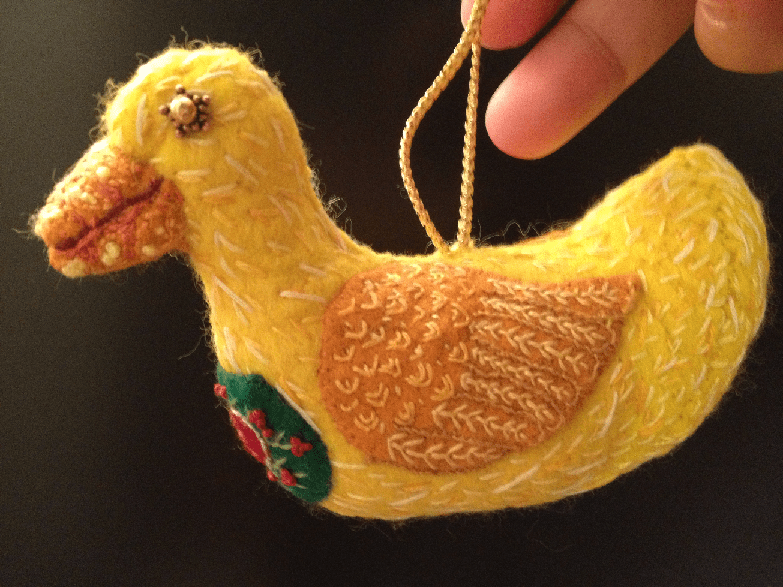
I used a straight stitch for the downy body, fly stitches for the feathers on the wings, buttonhole stiches to outline the wings and  french knots, outline stich and backstitch for the beak.  Oh and fly stitch, laisy daisy and outline and french knot for the heart patch.

Detail on Wool Duck Ornament

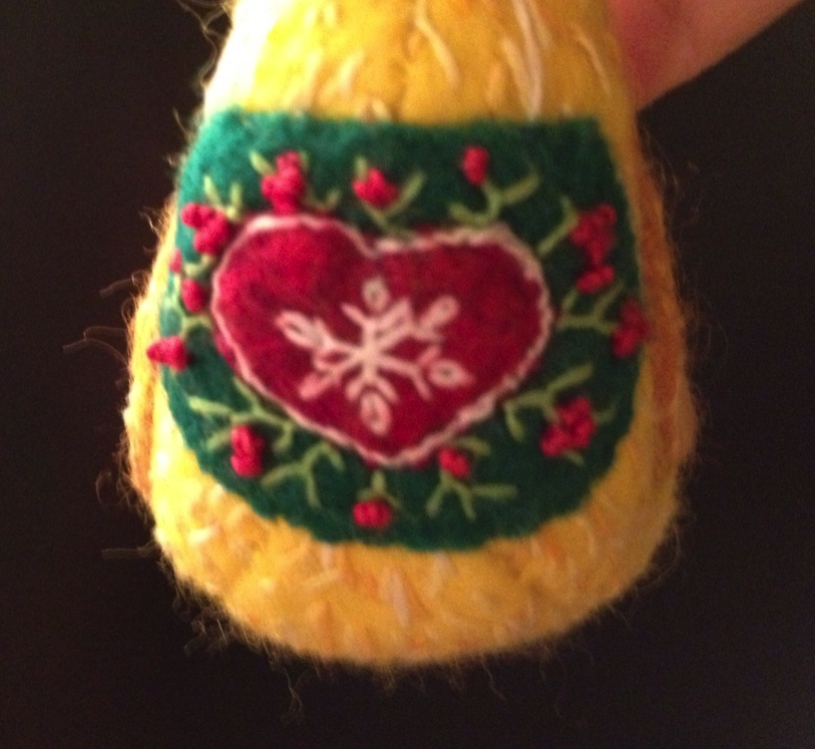
Then I turned it inside out, stitched it, and stuffed it.  It turned out a little wonky, to be honest, but I like the stitching effect and the cute little heart with holly berries. ”

Thanks for sharing, Jen! Keep it Thimble!

My Mom’s Hidden Bluework Talent

Although my mom doesn’t sew, she’s always up for going to the quilt shop with me to look at fabric.  She enjoys seeing the patterns, colors, and imagining all the fantastic projects I can make with them.  She tends to favor batiks and more modern looking styles, while I definitely prefer the reproduction and vintage fabrics.   So between us, we cover the  gamut of tastes.

Bluework Hand Embroidered Top

In June we went to her local quilt shop (which is called Granny’s – great name!) and she saw bluework panel based on vintage designs.  To my surprise, she bought in and said she was going to embroider each of the blocks.  When she was done, she would give to me and I could turn it into a quilt.  I joked that she had to do one square a week so it would be done by October.  We didn’t discuss a time frame for when I would have to get the quilt part done :).


Bluework Close-up

I received a package in the mail a few weeks ago, and it contained all her embroidered squares!  As you can see, she did a beautiful job, and some of the designs are quite intricate.  Now that I know she has this hidden talent, I plan to ask her to finish up some of my embroidery projects!

Bluework Close-up

As far as the quilt goes, I am going to cut the blue border from the blocks and use something else for the setting.   For the corner stones, I plan to do some blue and white four-patch blocks, and may do a blue and white sashing as well.  Mom has really set the bar high on this one – but on quality and on how quickly it can be done.

Keep it Thimble!


Fall Projects

I still owe you a report on my trip to Alaska and the quilt shops, and you will get that before the end of the year.  However, I have been busy working on some fall projects and should have lots to show and tell in the next month or so.

Fall Fabric Covered Box

Here’s a cute fabric covered box that I made from a class I took at Liberty Rose.  Sharon thought of this idea and taught it as a class.  This is one of my favorite projects because it only takes a 2 or so hours to complete from start to finish.  When done, it looks like something store-bought!

Project Storage Idea – Sara Lee Bakery Case

I found this Sara Lee Bakery Display at the local antique store.  It’s the perfect place to store all my works in progress.  As you can see, I have quite a few projects going on right now.  Most of these are 75% complete and will be done in the next few weeks.  Stay tuned!

Keep it thimble!

Two Pillows – Finally Finished!

First off, here’s my monthly stash reduction report for February 2012:

  • Used the last month: 4 yards
  • Used Year to Date: 5 yards
  • Added in the last Month: 2 yards
  • Added Year to Date: 32 yards
  • Net Used for 2012: +28 yards

As you can see, I had a much better month then January, since I actually used more fabric than I bought.    My overall net went down by 1 yard, so surely by the end of the year my net fabric used will be running in the negative (that’s the goal).

Wool Rabbit Throw Pillow

I also had time to finally finish two pillow kits that I’ve had for at least 4 years!   The first is a cute little wool bunny – perfect for Spring. This kit is from a LQS (local quilt shop), and I think the owner of the shop drew the bunny pattern.  This is wool applique on top of one of those colorful cotton dishtowels.  The trim is a cream colored fringe that sets off the pillow perfectly.

Fourth of July Pillow

The second pillow is from a Crabapple Hill pattern (I think it was a freebie pattern she offered a long time ago).  It is stitched with Red, White, and Blue perle cotton.  I love the fireworks!

What projects have you been able to complete this month?  What are you working on for Spring?

Keep it Thimble!

Tomato Penny Rug

Tomatoes always remind me of summer time and sewing!  I’m sure you can remember your grandmother’s well-worn tomato pincushions.  My friend Liberty Rose loves tomatoes pin cushions so much, she made this delightful pattern for a tomato penny rug.

Tomato Penny Rug

I started this project last summer and it is listed as one of the UFOs to finish for this year.  It can now be crossed off the list.  Right now it is sitting on top of the antique spool chest in my sewing room!  This is the fifth penny rug I’ve made in the past few years.  These little projects are fun to make because you can easily carry a few pennies around in your purse and stitch on them when you can.  Pennies are also fun because there is so much you can do with this as far as embellishments and embroidery!

I have a few ideas for my own penny rug designs based on Liberty Rose’s basic template (with her permission of course). I plan to get the patterns finished up by the end of the year as part of the pattern line I am creating.

Also, I have decided on the date for the quilter’s yard sale – July 23rd from 8am – 12pm.  If you want to do some virtual shopping, just let me know.  For those of you in the area, stop by (email me offline for my address).

Keep it Thimble!

Happy Fourth!

Hope everyone has a great Fourth!  The weather is beautiful and we are heading off to the big parade in downtown Apex.  The kids decorate their bikes, wagons, baby strollers, and march down main street waving flags and cheering!  At the end of the parade, the fire station has a firetruck set up to spray water on the kids so they can cool off.  Should be a lot of fun.

Wool Flags

There are some fun little wool flags made from a pattern by Debbie Busby 0f Wooden Spool Designs.  A vintage flower frog holds the flags quite nicely.  The sticks will be painted black and maybe a bow will be tied around some of the sticks.  I thought this would be a fairly quick project, but there is a lot of hand stitching involved, so it took a few hours to complete all 5.  They are small enough to carry around in your purse if you want to work on something for a few minutes while you are waiting.

Keep it thimble!

Thankful Turkey

Here is another Fall item (started two years ago) that is finally finished.  Last week it was plucked out of the UFO pile and given the finishing touches.   This was another project from Create and Decorate that was a lot of fun to make.   The feathers are cut out of wool, the veins are stitched on, and then they are treated with fabric stiffener (I used “Stiffy” – insert joke here 🙂 ).  Once the feathers are dry, the directions called for you to glue them together and then glue onto the body.  However, I had much better luck stitching everything with black perle cotten – it was much sturdier and you know it won’t come apart.

Give Thanks Turkey

The whole thing is brushed with coffee to give it that “prim” luck.  My husband keeps smelling coffee in the house although neither one of us drinks it (the coffee smell fades away after a few days).  The original directions made one that was about 12 inches high (suitable for a table centerpiece).  My is about half that size, since I thought a smaller one would be more versatile.