It’s been awhile, but I haven’t forgotten about you! Hopefully, I can get back to a more regular posting schedule. I am doing plenty of projects, just haven’t had the time to show them off.
This is a little pin cushion and a needle case made from selvages. I must admit,this is kind of addicting and the possibilities are endless once you have the basic selvage blocks completed. The needle case pattern from a book called Save the Selvages. The book contains all kinds of small projects you can make in just few hours.
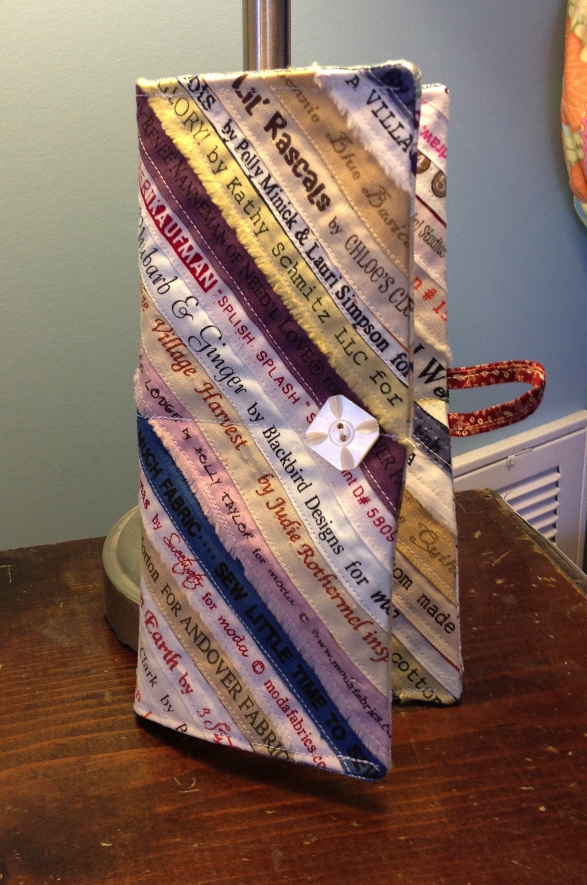
Here’s a pattern for what the book called a tea bag holder, but I used it for a wallet and check book cover.
Start saving your selvages and see what you can make! Keep it Thimble!
Wow, the summer is almost gone and I still have so much I wanted to accomplish. However, I had a great summer so I’m not complaining. I promise to get back to more regular posts this fall. Everyone deserves a summer break, don’t they?
In order to get inspired for writing up some new patterns and tutorials, I decided I needed a little inspiration. The sewing room is looking a bit drab because I haven’t made the curtains yet (which will be in a very vintage and cheery looking Minnick and Simpson fabric). So I decided to create a sewing machine cozy!
Sewing Machine Cozy
The tutorial is from Strawberry Patches and I figured this would be the best way to bring in a dash of cheer and inspiration to the room. Once the cover was completed, it seemed like it was missing something, so I decided to applique my favorite sewing slogan on it – and voila! – a constant and fun reminder of how to approach life.
For the applique, I used Steam a Seam 2, which is double-sided fusible web. I cut out the letters, fused them on, and then did a basic zigzag stitch around the edges to hold them in place. I love how it turned out!
I always have a few wool applique projects in process at any one time. I usually cut out all the wool pieces, get the embroidery floss, and the put everything in a Ziploc bag so it can be worked on later. They are great to stitch on in the evening when watching TV or just hanging out. As you can imagine, there are a few Ziploc bags sitting in my closet!
Sharon of Liberty Rose has a great idea for organizing all these items! This project notebook features wool applique on the front and inside cover (so you have a place to keep your needles and pins) and it pretty easy to sew together (I plan to post a tutorial about how to cover the notebook sometime before the end of the year). The notebook contains zippered pouches that are the perfect size for carrying all your project supplies.
Project Notebook
The notebook is standard 3 Ring binder. I ironed fusible fleece on my stitching fabric so that the cover is more durable (especially since it will be used a lot). I did some basic applique on the front and and inside cover.
Project Notebook - Inside
I didn’t go too crazy with the embroidery embellishments, since the main purpose is functional, not decorative. My embroidery time is better spent finishing up the wool crazy block that was started a year ago! A pocket on the back inside cover can carry larger pattern books that won’t fit in the pouches.
Project Notebook - Back Pocket
Now, when traveling, I just take out a zippered project pouch, throw it in the suitcase, and am good to go. Talk about Keeping it Thimble!
In other news, look for details in the next week or so on my first published pattern. In the meantime, here are some sneak peeks:
This is the last week before the big Porch Sale in the Barn. I can tell you I will be happy and relieved when it is over! One of my friends is coming over on Tuesday to help me get everything priced and organized. I have been busy this weekend making a few items and am pretty happy with how everything looks – so I hope everyone else like them too!
Sneak Peak 1Sneak Peak 2Sneak Peak 3Sneak Peak 4
Also, for those of you who have been eagerly waiting for my first pattern (which I said would be available in September), you are going to have to wait a bit longer. Real life just has a way of side-tracking my sewing plans – so I had to put pattern design on hold for a bit longer. After the porch sale I should be back to my normal amount of “too much to do”.
It’s a busy week as I get ready for the Porch Sale on Oct 14th. Here are a few sneak peeks – as you can see there is still a bit of work to be done!
WitchesOdds and EndsMore Odds and Ends
I also got this steam press today. I used one of these a long time ago in a class and found it is wonderful for ironing interfacing onto fabric and saves so much time! Since I am making things in bulk, I need to find ways to save time.
First, a big Happy Birthday to my friend Sharon Stewart at Liberty Rose. Have a great day!!
Second, Sharon was the master mind behind this project – a Sewing Scrapbook made out of paper lunch bags. She offered this as a one of her scrapbooking classes and I fell in love with it (I hardly ever scrapbook) so I had to take the class.
Sewing Scrapbook - Front CoverSewing Scrapbook - Interior 1
Sharon always does a lot of prep work for her classes and this was no different – she provided all the goodies for each page in the book – including the antique buttons. I added a few more embellishments when I got home – there are tons of great sewing images you can download for free from the internet!
Once you have a collection of images you want for your theme, you can use a color printer to print them out on cardstock. We used off-white and brown kraft cardstock, which coordinates nicely with the paper bags. Once the images are printed, you can cut them out, distress them, and place into the book. You can use this for tons of different themes (I have a few ideas) and they are a great craft for kids. Use colored pencils to add a dash of color to some of the drawings, and scraps of fabric and trim are put to good use as well.
We also used some of the paper from old patterns to add some texture and visual interest. For the pockets, you create square cards, print an image on them, add a tab, and have a little surprise in the book (see Interior 5 for an example, the little girl on the right is one of these tabbed cards that goes inside). Sharon used images of embroidery stitches we would have a handy reference for how to do some basic stitches.
Sewing Scrapbook - Back Cover
They are very easy to make. Start with three brown paper lunch bags and fold them in half. Stack them by alternating where the opening is placed so there two openings on side side and one on the other side (also make sure the bottom bag flaps are on the inside pages, not the front and back covers), and then staple down the middle.
Lunch Bag Scrapbook - View 1Lunch Bag Scrapbook - View 2
Once you have your little book – you can decorate it however you want! I have made a few of these for my son already. He enjoys drawing pictures on each page and using rubber stamps and stickers to embellish them.