These cute sewing machine ornaments at the NC Museum of History — the perfect decoration for any seamstress! If you’re not in NC, you can order one of these online at Target.
The museum currently has a large exhibit called Quilt Speak that is exhibiting there until early March 2020. I will be writing up a longer blog post this weekend about my experience at the exhibit. There were truly some amazing quilts on display!
Bags and purses are one of my favorite things to make. I have the perfect bag for almost anything. My favorites to make are roomy bags with lots of pockets and storage.
This first one is from a Quilts Illustrated a pattern. I can’t remember the fabric, but it is a lovely blue color with yellow accents. It’s just the right size for a handbag that carries a wallet, book, and a few other odds and ends.
This second one is a By Annie pattern. I love her patterns! I’ve made several of her patterns, but this is my favorite one so far. When I finished sewing the bag I used a tailor’s point press to help me press all the seams on the bag to give it a nice crisp look! The fabric is canvas weight from Melody Miller’s “Picnic” line. This is a very durable and versatile bag.
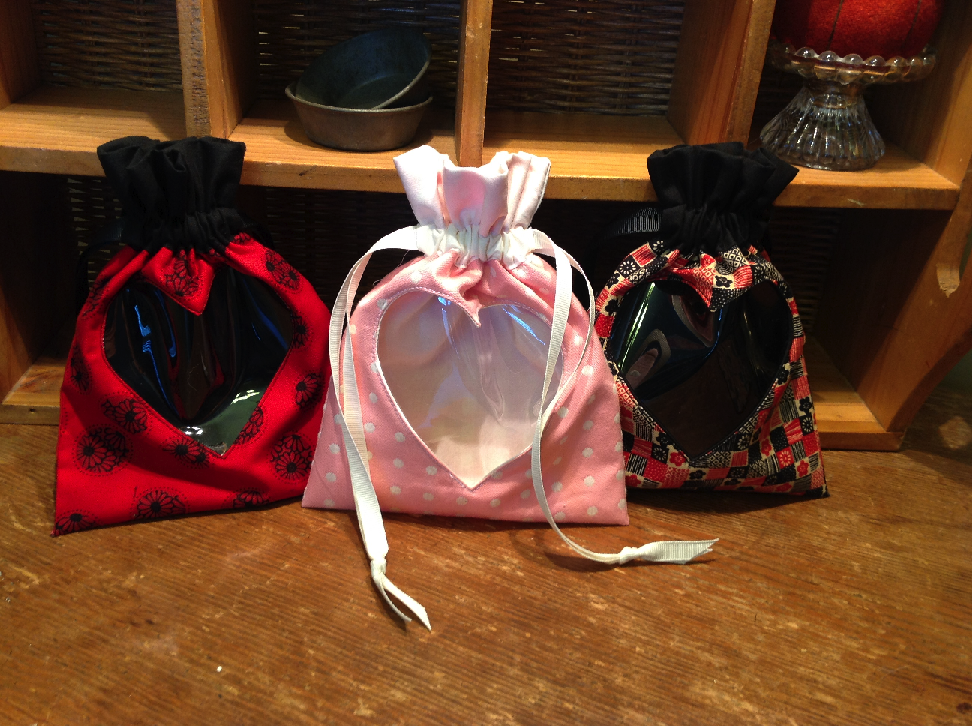
I found the tutorial for these drawstring pouches at Twinkle and Twine. They are so cute and very easy to make. I made six in one afternoon, I could have made more, but ran out of vinyl for the windows. The tutorial has great directions, even for beginners.
I plan to make these with other cut-out shapes for different occasions – a baby rattle, christmas tree, cupcake, and so on. I’m even going to make one with a thimble, of course!
It’s been awhile, but I haven’t forgotten about you! Hopefully, I can get back to a more regular posting schedule. I am doing plenty of projects, just haven’t had the time to show them off.
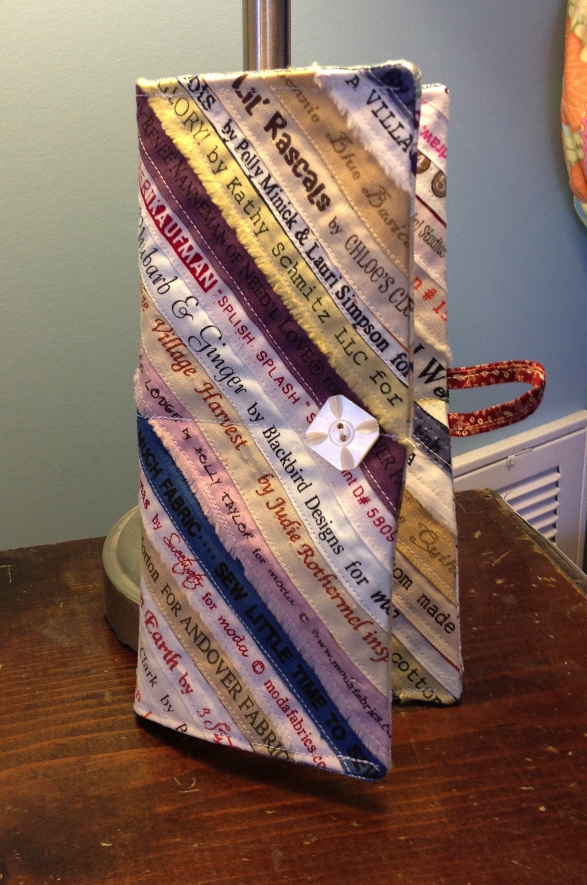
This is a little pin cushion and a needle case made from selvages. I must admit,this is kind of addicting and the possibilities are endless once you have the basic selvage blocks completed. The needle case pattern from a book called Save the Selvages. The book contains all kinds of small projects you can make in just few hours.
Here’s a pattern for what the book called a tea bag holder, but I used it for a wallet and check book cover.
Start saving your selvages and see what you can make! Keep it Thimble!
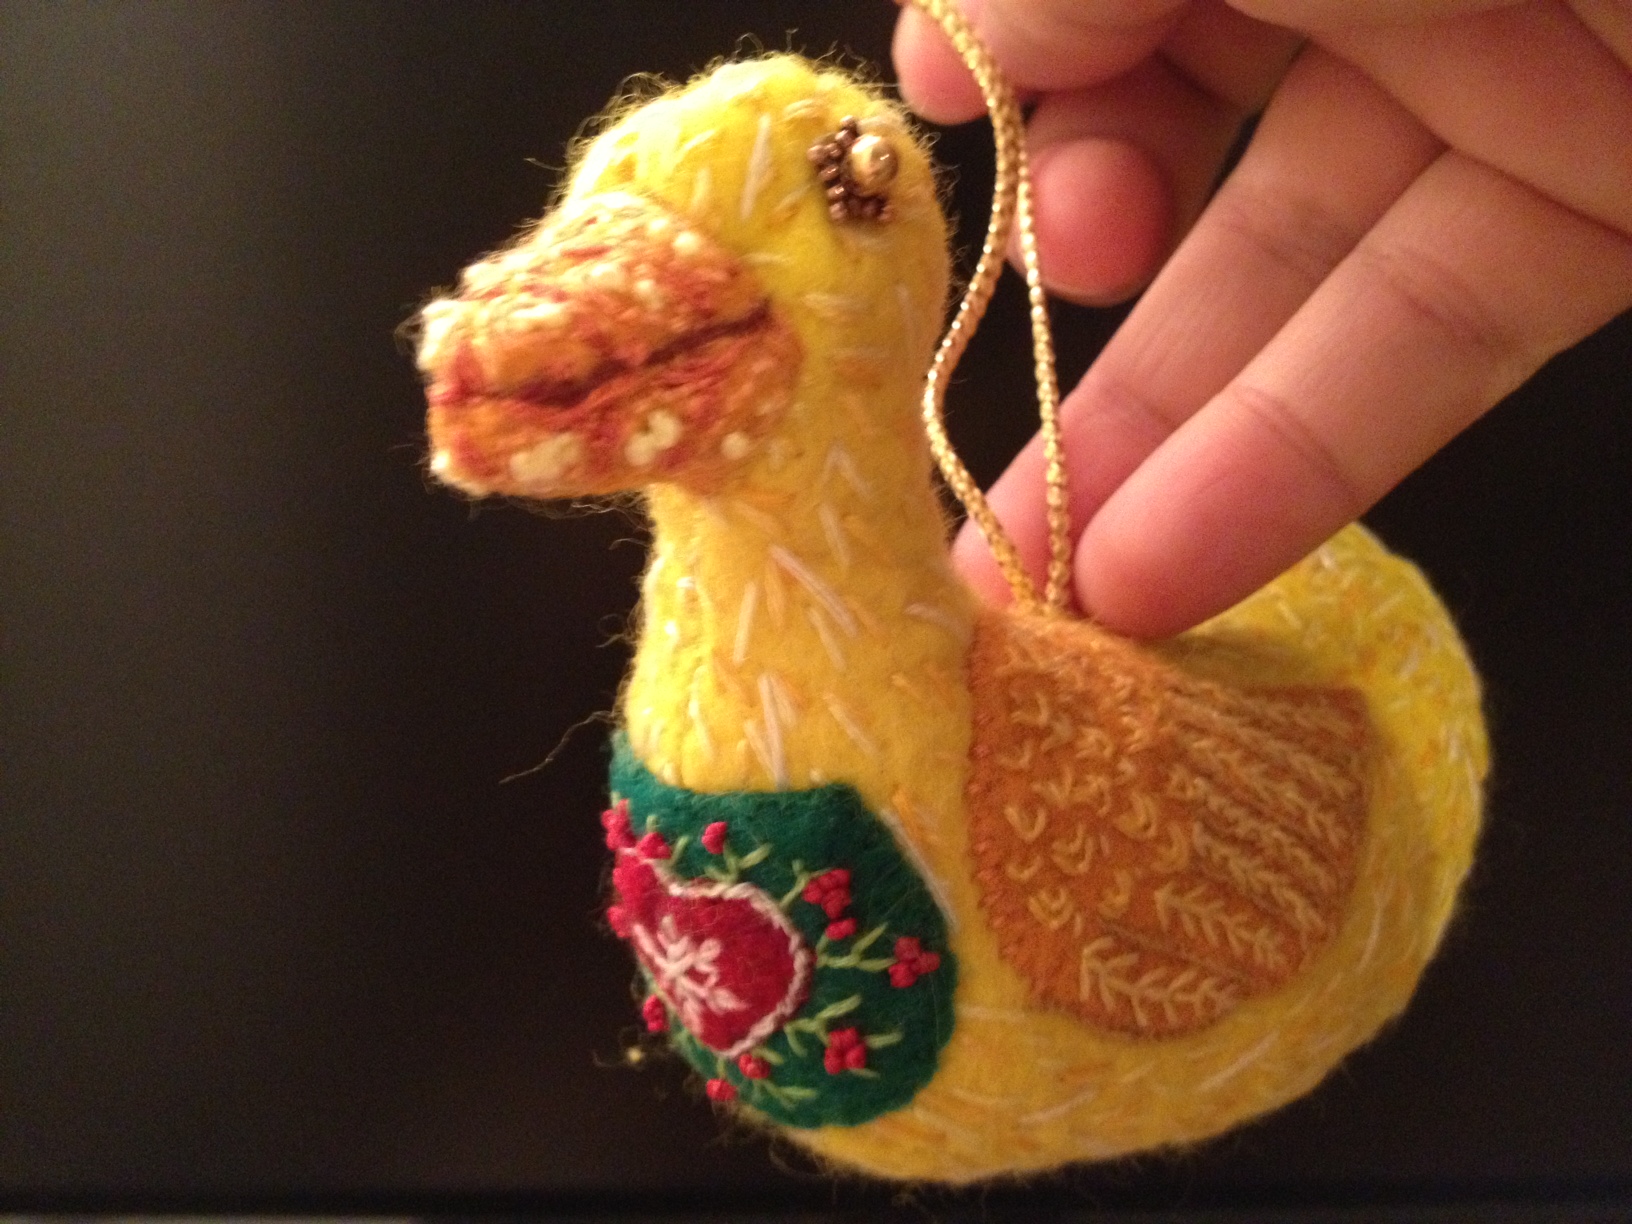
My friend Jen just sent me photos of this adorable duck ornament she made for her child’s teacher.
Wool Duck Ornament by Jen
I asked Jen to tell me about her process:
“Sure! I made it from this pattern http://noseynest.blogspot.com/2008/06/lucky-ducky-freebie.html but I turned it inside out to hide the seams. I like the look of hidden seams better, but it made his head so small! Wasn’t thinking about that when I changed it though. It’s just on regular wool felt, and before sewing it together I used embroidery thread to stitch on the decorative stitches.
Detail of Wing on Wool Duck Ornament
I used a straight stitch for the downy body, fly stitches for the feathers on the wings, buttonhole stiches to outline the wings and french knots, outline stich and backstitch for the beak. Oh and fly stitch, laisy daisy and outline and french knot for the heart patch.
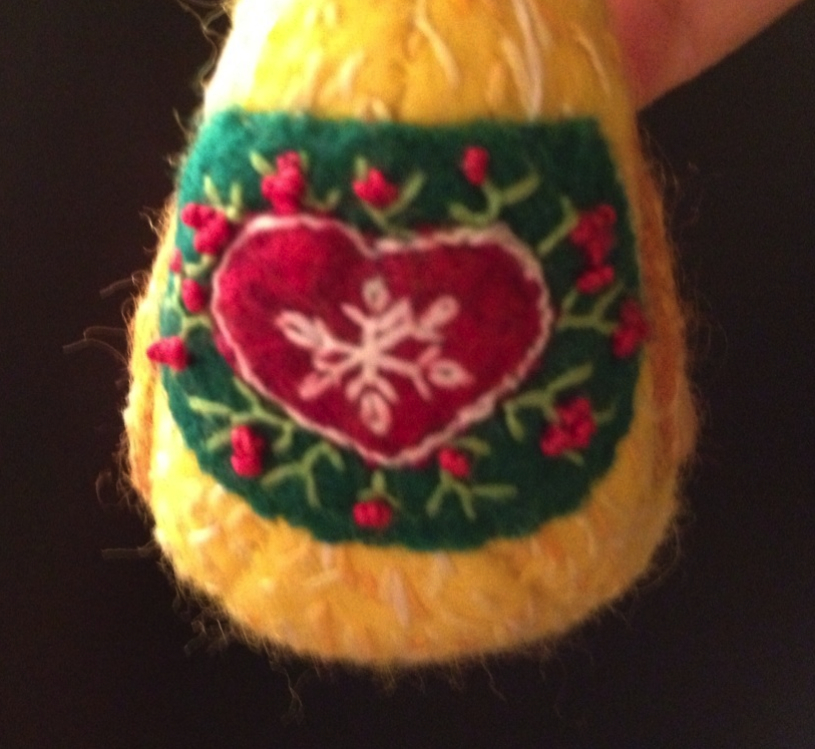
Detail on Wool Duck Ornament
Then I turned it inside out, stitched it, and stuffed it. It turned out a little wonky, to be honest, but I like the stitching effect and the cute little heart with holly berries. ”
Only 128 more days until Christmas! Normally at this time of the year, I am thinking about Halloween and working on fall projects, but let’s take a quick detour to Christmas today. I have a whole stack of UFOs sitting near my work table, and I am slowly working through them. Today I finished up some wool Christmas ornaments that I started 2 years ago!
Wool Ornaments
This is the “Trimmings” pattern from Wooden Spool Designs (ppst – the pattern is on sale at her website). It’s a great way to use up wool scraps. They also make lovely gift tags and teacher gifts.
June has been a busy month for me, so the blogging has taken a backseat to my real world job. However, I have been busy sewing – which is great! Regular readers will know how much I love the Professional Tote pattern by Creative Thimble. I have made a lot of these totes and I truly consider it to be the perfect bag!
Professional Tote – California Girl Fabrics
My son finished school about two weeks ago and I wanted to make a special gift for his teachers. The Professional Tote immediately came to mind. I knew that one teacher liked green and the other blue, and that they seemed to favor more modern prints, which lead me to select fabrics from California Girl (designed by Fig Tree) and Ruby (designed by Bonnie and Camillle) for their bags.
Professional Tote – Ruby Fabrics
I loved the fabrics so much, I decided to make one for myself too. Even though I have made this pattern a ton, I only have one professional tote that I use (for the beach). and it would be nice to have one for work purposes. The center zippered divider is the perfect size for carrying my iPad.
Professional Tote – Ruby Fabrics
Needless to say, while I did have all the supplies bought well in advance, I didn’t actually cut them out and sew them together until two days before. However, the sewing goes pretty fast since I am so familiar with the pattern. Of course, mine (the gray one) was put on hold until the following weekend so that I could get finish the ones for the teachers. I took them in at lunch on the last day, and I could tell the teachers were thrilled with them – and that always feel good when people like your work!
What gifts have you made that really hit the mark?
School will be out in 15 days (!), and it’s time to think about end of the year teacher gifts. Teachers always appreciate a gift card, but it’s also nice to make them a little something just so the gift is more personal. I was trying to think of something fun and easy, since my son has lots of teachers, and then I remembered the good old travel tissue holder! You can tuck the gift card in the opening, tie a pretty bow around it, and it is the perfect teacher gift.
Tissue Covers
There are a lot of tutorials online on how to make these, so I figured it would be fun to share some of them with you and show you my finished results. For mine, I used a tutorial posted at Melinda’s Quilts, ETC (http://melinful.blogspot.com/2010/01/travel-tissue-cover-tutorial.html). The reason I liked this one is because it just uses two pieces of fabric (exterior and lining) and is sewn in a way that makes its own trim on the edges of the opening. It literally took me 10 minutes to cut out the fabric and sew it together.
Press Seam Open
After sewing the tube, I used my point presser and centered the seam on the top part so that the seam could be pressed open (see above).
Pinked Raw Edges
In addition, the raw edges were cut with pinking shears to prevent them from raveling. This gives nice finished edge and you don’t have to mess with bias tape.
Back of Tissue Holder – Fussy Cut
Lastly, on one of the covers I fussy cut the fabric so that the floral motif was centered on the back of the tissue holder. Also, these are great stashbusters – you only need 2 scraps of fabric less than 8″ square for each one (and a packet of travel tissues from Target).
Here are some links to some other tutorials:
Sew Much 2 Luv has a fun tutorial that uses 4 scraps of fabrics.
The Distracted Domestic has a tutorial that is a variant on the method Sew Much 2 Luv uses – but it uses just one strip of fabric.
Whimwham at Craftstylish posted a tutorial that shows you how to add some fancy machine embroidery on the front. This is a great way to personalize the gift.
Craftapalooza at Whipup discusses her LAB technique for making these. She uses trim around the opening for a nice contrast.
What are your ideas for teacher gifts? I’m always on the hunt for more fun and easy projects.
Happy May Day! To celebrate, the Radiant Folded Patchwork Star and covered box pattern is on sale for $2.99.
Radiant Folded Star and Covered Box
You can use the Folded Star in a variety of ways – table toppers, covered boxes, clothing and accessory accents, and more!
This pattern includes full step by step directions for both a fabric covered box and a table topper. Photographs of key steps are also included.
These Folded Stars are fat quarter friendly, great stashbusters, and useful for scraps! Use Christmas fabrics to create a festive holiday table topper. Use pastels or batiks to create a striking storage box. Make a scrappy star to complement your latest quilt. The possibilities are endless! The pattern is easy to make and requires little sewing. This is a great project for kids and confident beginners.
You are purchasing a PDF pattern which will be available for immediate download after purchase. After your payment is processed, you will be e-mailed a link from which you can download the pattern.
Last week, my husband discovered a nest of baby rabbits in our back yard! They grow pretty quickly and recently were big enough to leave the nest. It was hard to get a good picture of them since we didn’t want to disturb them. The mama rabbit would come by in the evenings to check on and feed her two little bunnies. They are so cute and we were sad to see them go, but maybe they will come back to say “hello” on Easter.
Baby Rabbits!
Speaking of Easter, you probably have everything you need for your baskets, but if you are looking for a fun and quick project, click HERE for my tutorial on how to make a Sock Bunny! I made these last year was very pleased with the results. If you have time, you can also make a colorful vest, dress, or bonnet for your rabbit.