Pineapple Pinkeep

I can’t believe it’s almost the end of January!  This year I am focusing on finishing projects that have been 90% finished for a few years.  So far I’ve put the binding on three quilts and have prepped three other quilts for the longarm quilter.  In between finishing projects, I am doing smaller projects that can be finished in a few days.

pineapple

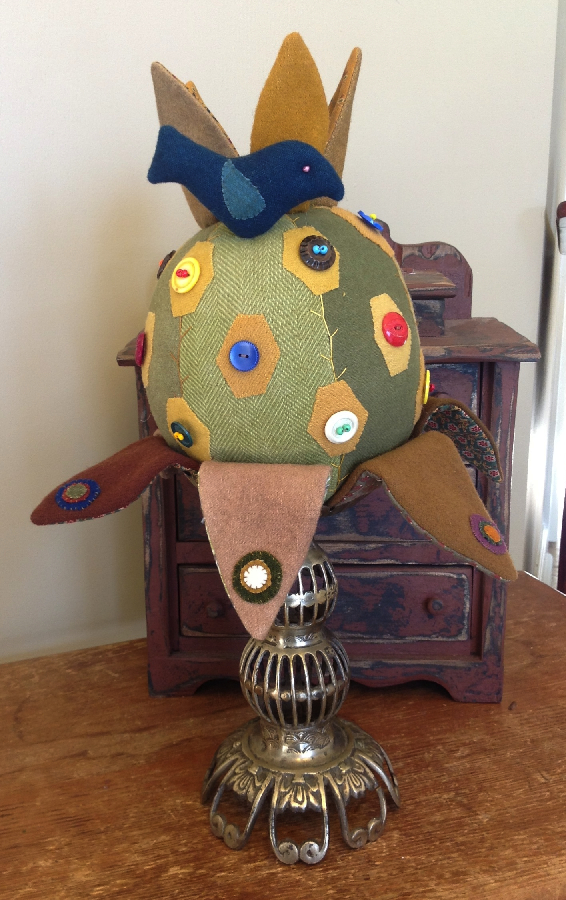
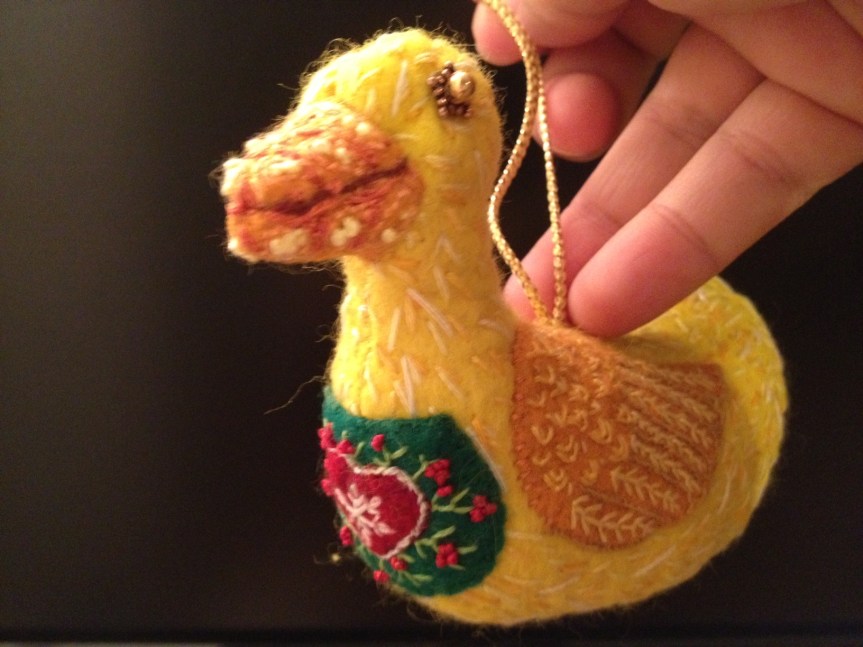
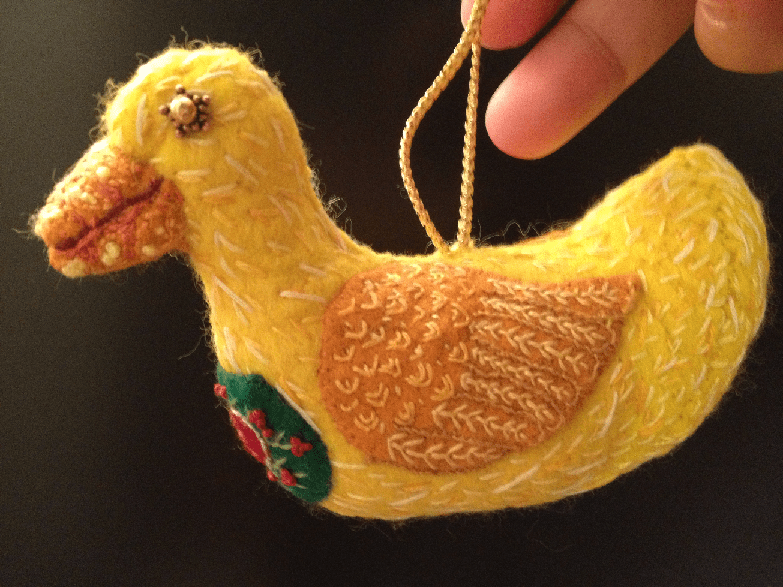
This is the Pineapple Pinkeep from a pattern by Sue Spargo.  I saw this pattern years ago and always liked it, but never made it.  During one of my thrift store visits, I found this beautiful brass candle bass for 3!  When I saw the base, I knew it would be perfect for the Pineapple Pinkeep.

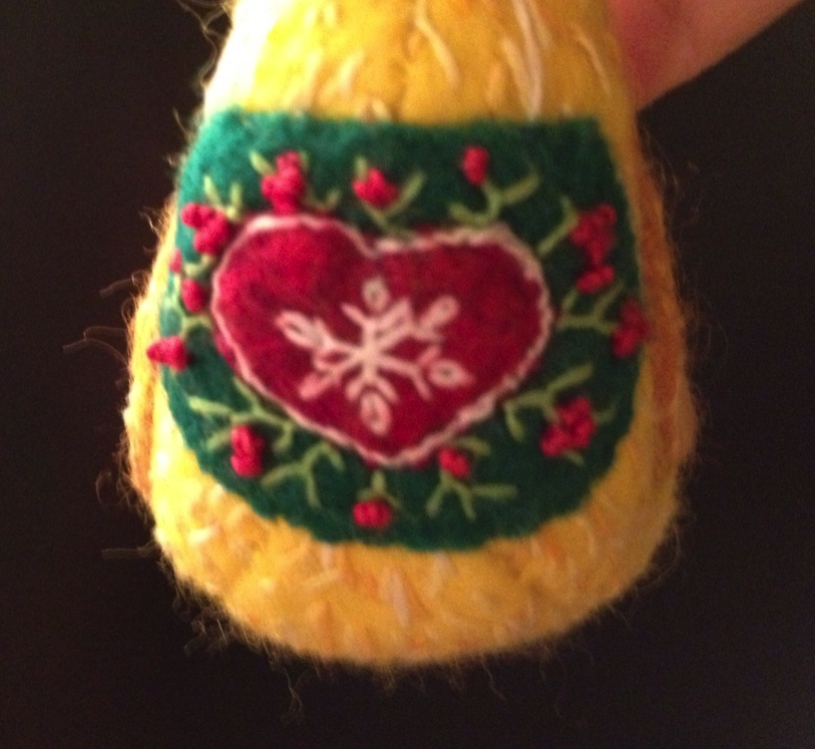
This project was a lot of fun to put together.  Picking out the wool and buttons to use was the best part.  I also spritzed the wool with some walnut crystal spray so it wouldn’t look too bright (especially on the leaves).  The pineapple is the perfect way to “welcome” in the New Year!

Keep it Thimble!

Wool Duck Ornament by Jen

My friend Jen just sent me photos of this adorable duck ornament she made for her child’s teacher.

Wool Duck Ornament by Jen

I asked Jen to tell me about her process:

“Sure!  I made it from this pattern http://noseynest.blogspot.com/2008/06/lucky-ducky-freebie.html but I turned it inside out to hide the seams.  I like the look of hidden seams better, but it made his head so small!  Wasn’t thinking about that when I changed it though.  It’s just on regular wool felt, and before sewing it together I used embroidery thread to stitch on the decorative stitches.

Detail of Wing on Wool Duck Ornament

I used a straight stitch for the downy body, fly stitches for the feathers on the wings, buttonhole stiches to outline the wings and  french knots, outline stich and backstitch for the beak.  Oh and fly stitch, laisy daisy and outline and french knot for the heart patch.

Detail on Wool Duck Ornament

Then I turned it inside out, stitched it, and stuffed it.  It turned out a little wonky, to be honest, but I like the stitching effect and the cute little heart with holly berries. ”

Thanks for sharing, Jen! Keep it Thimble!

Here Comes Santa Claus!

I had a class with Liberty Rose yesterday and we made this Santa Claus pillow.   The face is embroidered with one strand of floss and a silver floss was used to get the twinkles in his eye.  When the face and other parts were stitched down, a bit of stuffing was added to make him “pop” off the background.  I added the “ho, ho, ho” on the side since he wasn’t quite centered by himself.

Ho ho ho! Santa Claus Pillow

What Christmas projects are you trying to finish up before the holidays?

Keep it thimble!

Tis the Season – Frosty the Snowman

Now that it’s finally December, I can start posting Christmas things!  I had a crazy idea about posting something everyday in December as a sort of holiday countdown, but the reality of doing that is a different story.

Frosty the Snowman Makedo
Frosty the Snowman Makedos

Last year I planned to make a bunch of these cute little Frosty make-dos; they were all cut out, the heads were sewn, the candlesticks were prepped, but I just didn’t manage to finish them.  This year I completed 12 of them and they are being sold at a local shop.  I think they turned out pretty cute!

My favorite part is the carrot nose that sticks out.  Some of the carrots turned out a bit crooked, which give the face a lot of character.  I made one snow woman because a customer requested both a man and woman.  She has on ear muffs and a different face.  Unfortunately, I didn’t get a picture of her before she went to her new home!

Keep it thimble!

Farmers Market Wool Mat

I finally finished this project!  It a very colorful wool table topper for my kitchen table.  The pattern originally appeared in the Summer 2012 issue of Primitive Quilts and Projects, but it was a tote bag.  Liberty Rose had a great idea to turn it into a table topper, which has a lot less stitching.

Farmers Market Mat

I love the bright colors and it will look perfect in the kitchen!  My son really wanted me to add a pumpkin this, but I was able to talk him out of it.  Since I already had the bright orange carrots, I thought a pumpkin might be a bit much.  What do you think?

Keep it Thimble!

Fall Projects

I still owe you a report on my trip to Alaska and the quilt shops, and you will get that before the end of the year.  However, I have been busy working on some fall projects and should have lots to show and tell in the next month or so.

Fall Fabric Covered Box

Here’s a cute fabric covered box that I made from a class I took at Liberty Rose.  Sharon thought of this idea and taught it as a class.  This is one of my favorite projects because it only takes a 2 or so hours to complete from start to finish.  When done, it looks like something store-bought!

Project Storage Idea – Sara Lee Bakery Case

I found this Sara Lee Bakery Display at the local antique store.  It’s the perfect place to store all my works in progress.  As you can see, I have quite a few projects going on right now.  Most of these are 75% complete and will be done in the next few weeks.  Stay tuned!

Keep it thimble!

Christmas Trimmings

Only 128 more days until Christmas!  Normally at this time of the year, I am thinking about Halloween and working on fall projects, but let’s take a quick detour to Christmas today.  I have a whole stack of UFOs sitting near my work table, and I am slowly working through them.  Today I finished up some wool Christmas ornaments that I started 2 years ago!

Wool Ornaments

This is the “Trimmings” pattern from Wooden Spool Designs (ppst – the pattern is on sale at her website).  It’s a great way to use up wool scraps.  They also make lovely gift tags and teacher gifts.

Keep it Thimble!

Wool Applique Project Notebook

I always have a few wool applique projects in process at any one time.  I usually cut out all the wool pieces, get the embroidery floss, and the put everything in a Ziploc bag so it can be worked on later.  They are great to stitch on in the evening when watching TV or just hanging out.  As you can imagine, there are a few Ziploc bags sitting in my closet!

Sharon of Liberty Rose has a great idea for organizing all these items!  This project notebook features wool applique on the front and inside cover (so you have a place to keep your needles and pins) and it pretty easy to sew together (I plan to post a tutorial about how to cover the notebook sometime before the end of the year).  The notebook contains zippered pouches that are the perfect size for carrying all your project supplies.

Project Notebook

The notebook is standard 3 Ring binder.  I ironed fusible fleece on my stitching fabric so that the cover is more durable (especially since it will be used a lot).   I did some basic applique on the front and and inside cover.

Project Notebook - Inside

I didn’t go too crazy with the embroidery embellishments, since the main purpose is functional, not decorative.  My embroidery time is better spent finishing up the wool crazy block that was started a year ago!  A pocket on the back inside cover can carry larger pattern books that won’t fit in the pouches.

Project Notebook - Back Pocket

Now, when traveling, I just take out a zippered project pouch, throw it in the suitcase, and am good to go.  Talk about Keeping it Thimble!

In other news, look for details in the next week or so on my first published pattern.  In the meantime, here are some sneak peeks:

Pattern Sneak Peek 1
Pattern Sneak Peak 2

Keep it Thimble!

Sneak Peek

It’s a busy week as I get ready for the Porch Sale on Oct 14th.  Here are a few sneak peeks – as you can see there is still a bit of work to be done!

Witches
Odds and Ends
More Odds and Ends

I also got this steam press today.  I used one of these a long time ago in a class and found it is wonderful for ironing interfacing onto fabric and saves so much time!  Since I am making things in bulk, I need to find ways to save time.

Steam Press

Keep it thimble!