Hello friends! I’m participating in a 31 day blog challenge that starts today. I’m posting every day in December in the hopes of getting back into the habit of making patterns, tutorials, and sharing fun things related to sewing.
Over the past four years I’ve made some quilts, bags, stuffed toys, wool applique hangings, and learned to Zentangle. I also mastered my Cameo Silhouette and have been making personalized cups and other items.
Tomorrow, I’ll post some pictures of some of the things I’ve made recently.
Wow, can’t believe it has been over a year since I posted something! I’ve been busy sewing and doing projects, but just haven’t had the time to take pictures and put together the posts. I plan to start posting a bit in 2016.
I signed up for a UFO challenge at my local quilt shop and I hope to complete ten UFOs by March 31! I think I have a good chance of getting 8 completely done, and two will just have some progress made. Will post a list of the projects in the next few days so you can can see what I’ve been up to this past year.
I love the books by Aranzi Aranzo. Fittingly, their books are called “The Cute Book,” “The Cuter Book,” “Cute Stuff” and so on. This is one of their patterns from “Cute Dolls.”
Pretty easy to make and only about 3″ high. I made this from craft felt and it took about 30 minutes from start to finish. The pieces are a bit small, so I enlarged the pattern by 15% to make it easier.
These would make really cute ornaments or package decoration! You could also glue a pin on the back so it could be a cute fashion accessory!
My son is crazy about mushrooms. Last year for Christmas he wanted a book titled Mushrooms of West Virginia and the Central Appalachians (of course he got it!). He came up with this fun little mushroom craft that requires very few supplies.
Supplies Needed:
1″ Wooden spools or knobs (one for each mushroom)
Fabric scraps to make 2 1/2″ circles
Thread
Glue
Markers
He rooted through my scrap basket and selected about 11 different fabrics that looked like mushroom tops. Batiks work well for this, as do tone on tone prints. He also found that the reverse side of the fabric would sometimes work.
Next, cut out a 2 1/2″ circle from each fabric scrap. Using a needle and thread, sew a running stitch about 1/3″ in from the edge. Gather the circle and add a small bit of stuffing. When making the first one (pictured above) we placed the wooden spool instead the gathered circle and pulled the thread tight, and tied it off. This was pretty awkward and too some time to get the thread tight enough. For the other ones, we gathered up the circle, stuffed it, tied it off, and then glued the “puff” on top of the wooden spool. That worked much better and was even cuter!
Once the mushroom is dry, use a green marker to draw a bit of grass at the bottom. If you like, add a smiley face!
I cut out a piece of green felt for the meadow and gave him a plastic Crystal Light container for storage. Viola! A portable mushroom meadow!
This has been a busy summer and now it’s National Sewing Month. Even though I haven’t posted for quite some time, I’ve been able to finish some projects. I will be posting them throughout the month so you can see what I’ve been doing.
What projects have you been working on this summer? What projects do you plan to make this fall?
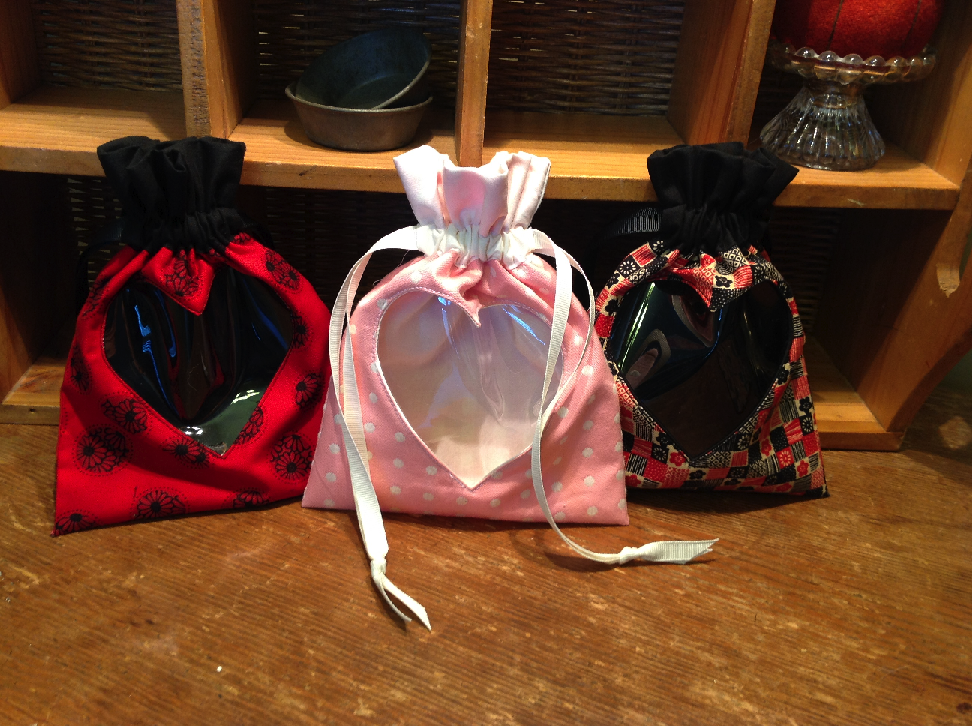
I found the tutorial for these drawstring pouches at Twinkle and Twine. They are so cute and very easy to make. I made six in one afternoon, I could have made more, but ran out of vinyl for the windows. The tutorial has great directions, even for beginners.
I plan to make these with other cut-out shapes for different occasions – a baby rattle, christmas tree, cupcake, and so on. I’m even going to make one with a thimble, of course!
Some of you may recall that my son and I worked together on Perry the Paramecium over two years ago! This was a fun project that basically involved him telling me what he wanted and me making it. Now that he is older, he is a lot more involved in the collaborative process.
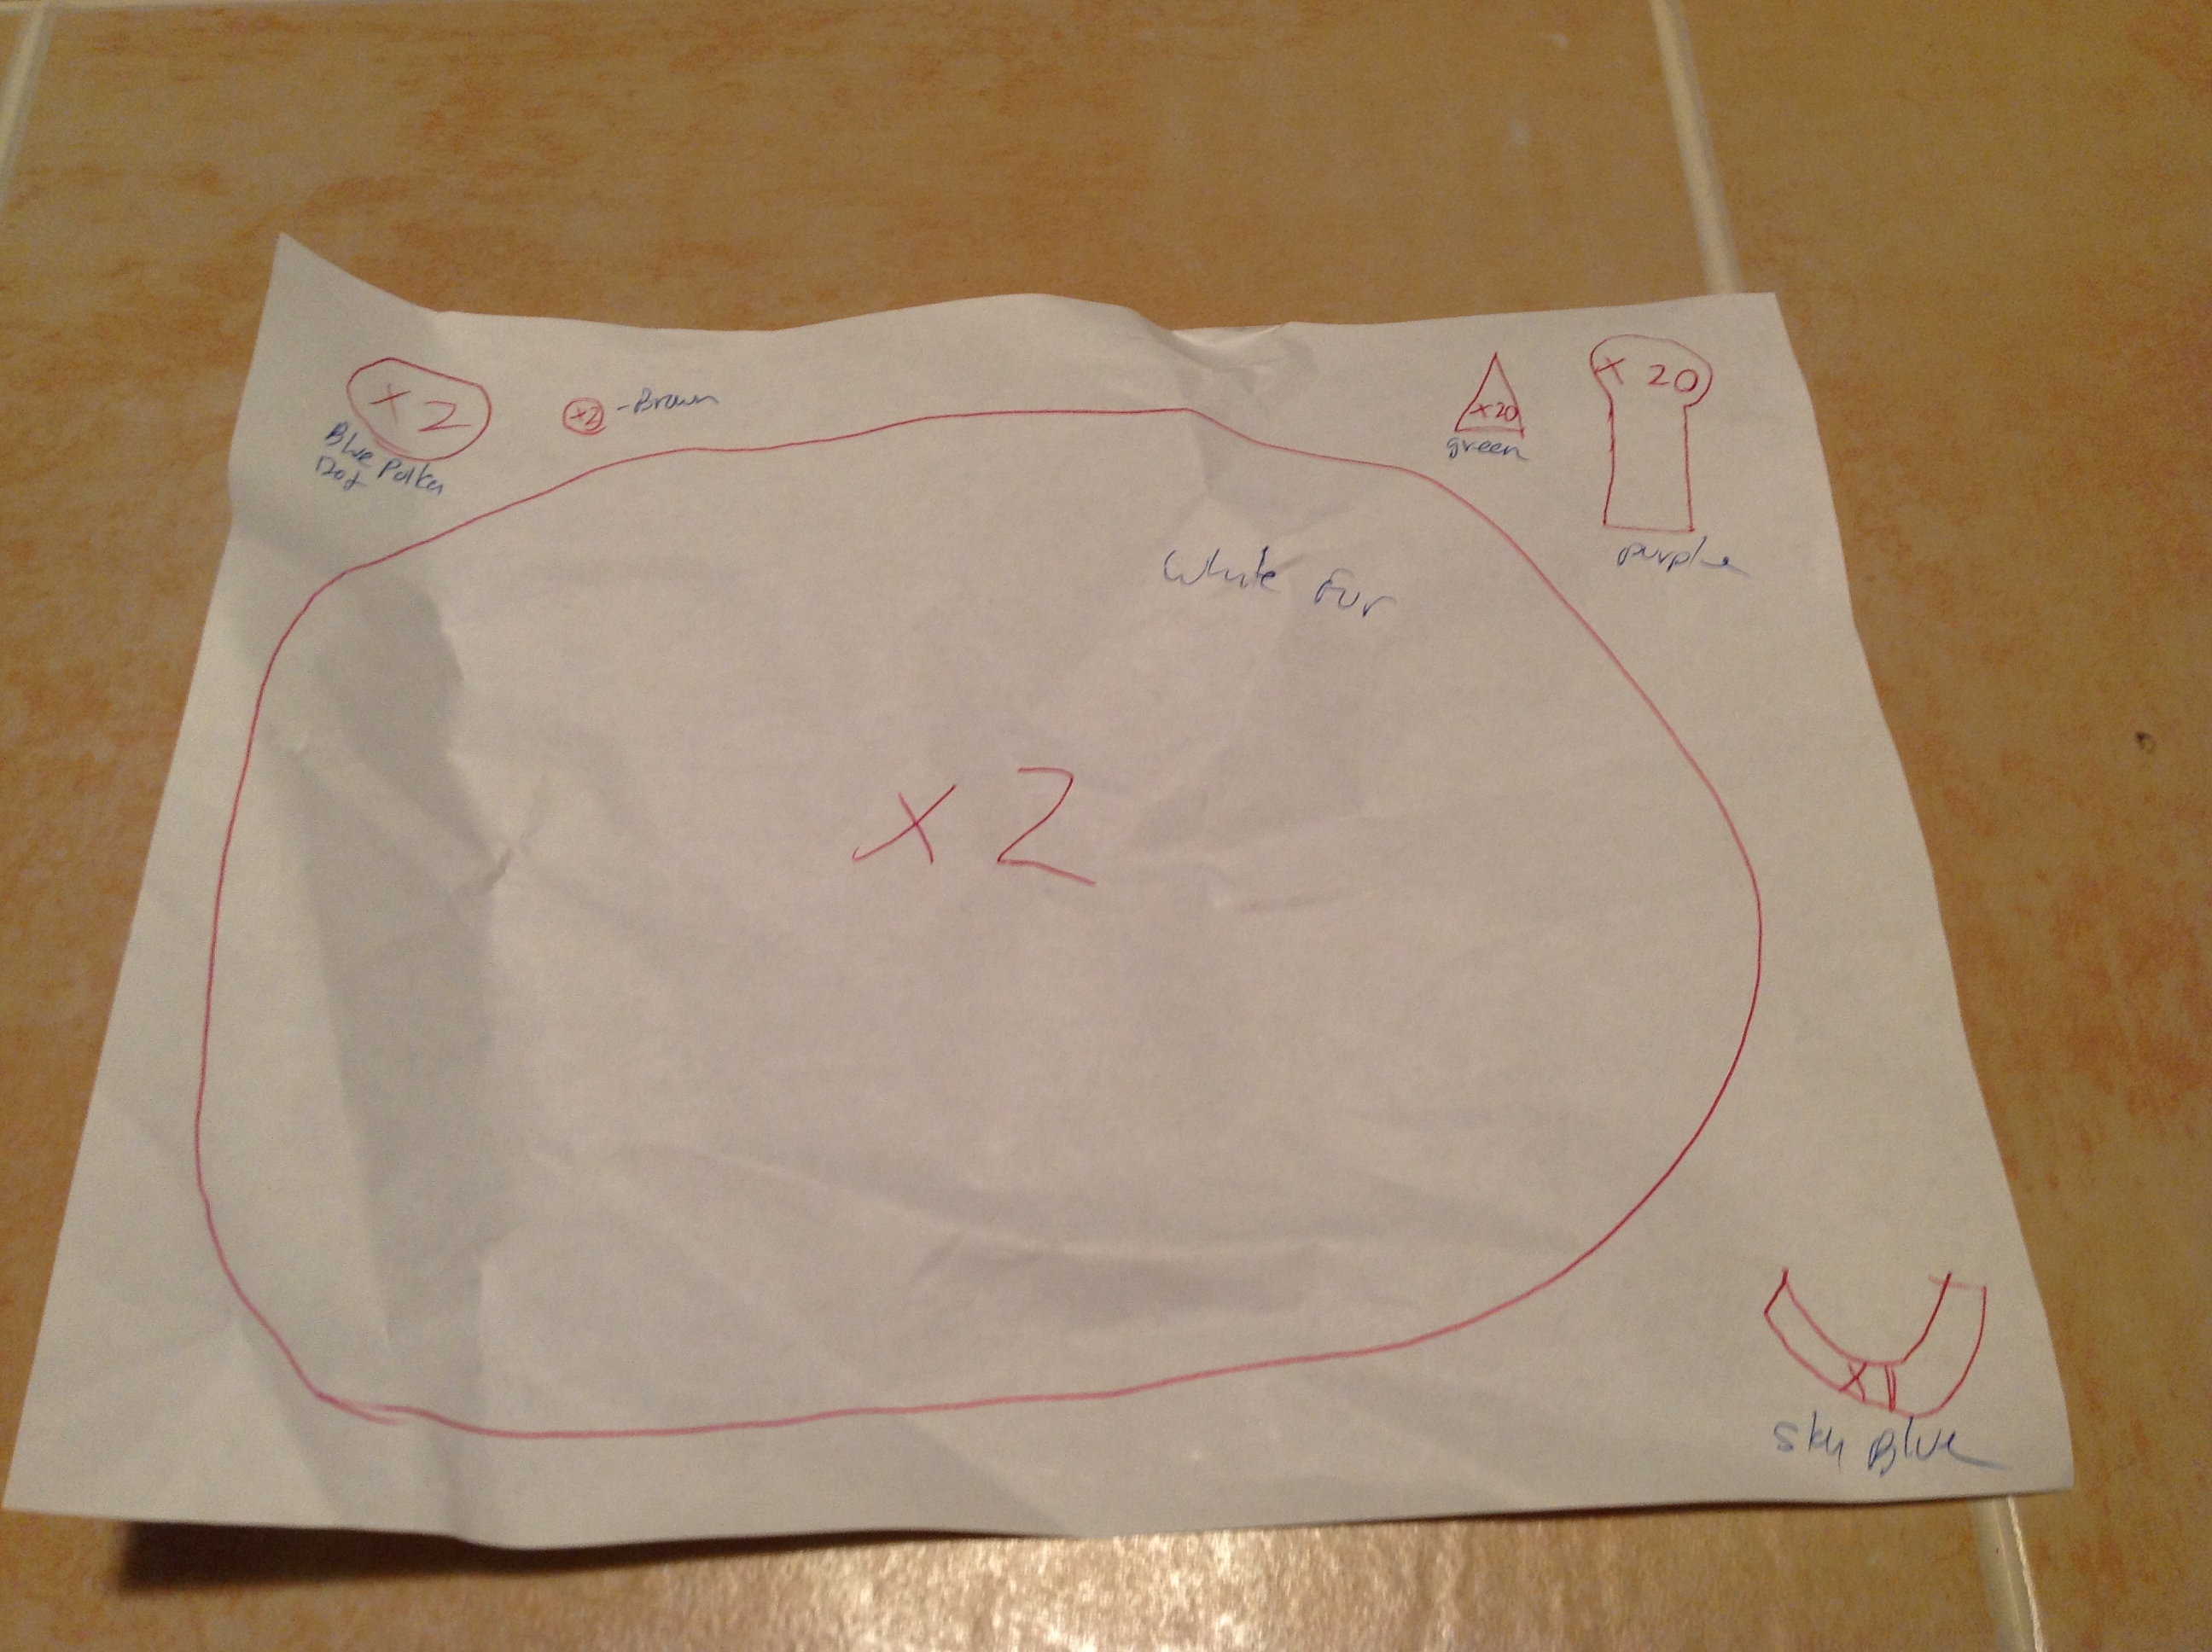
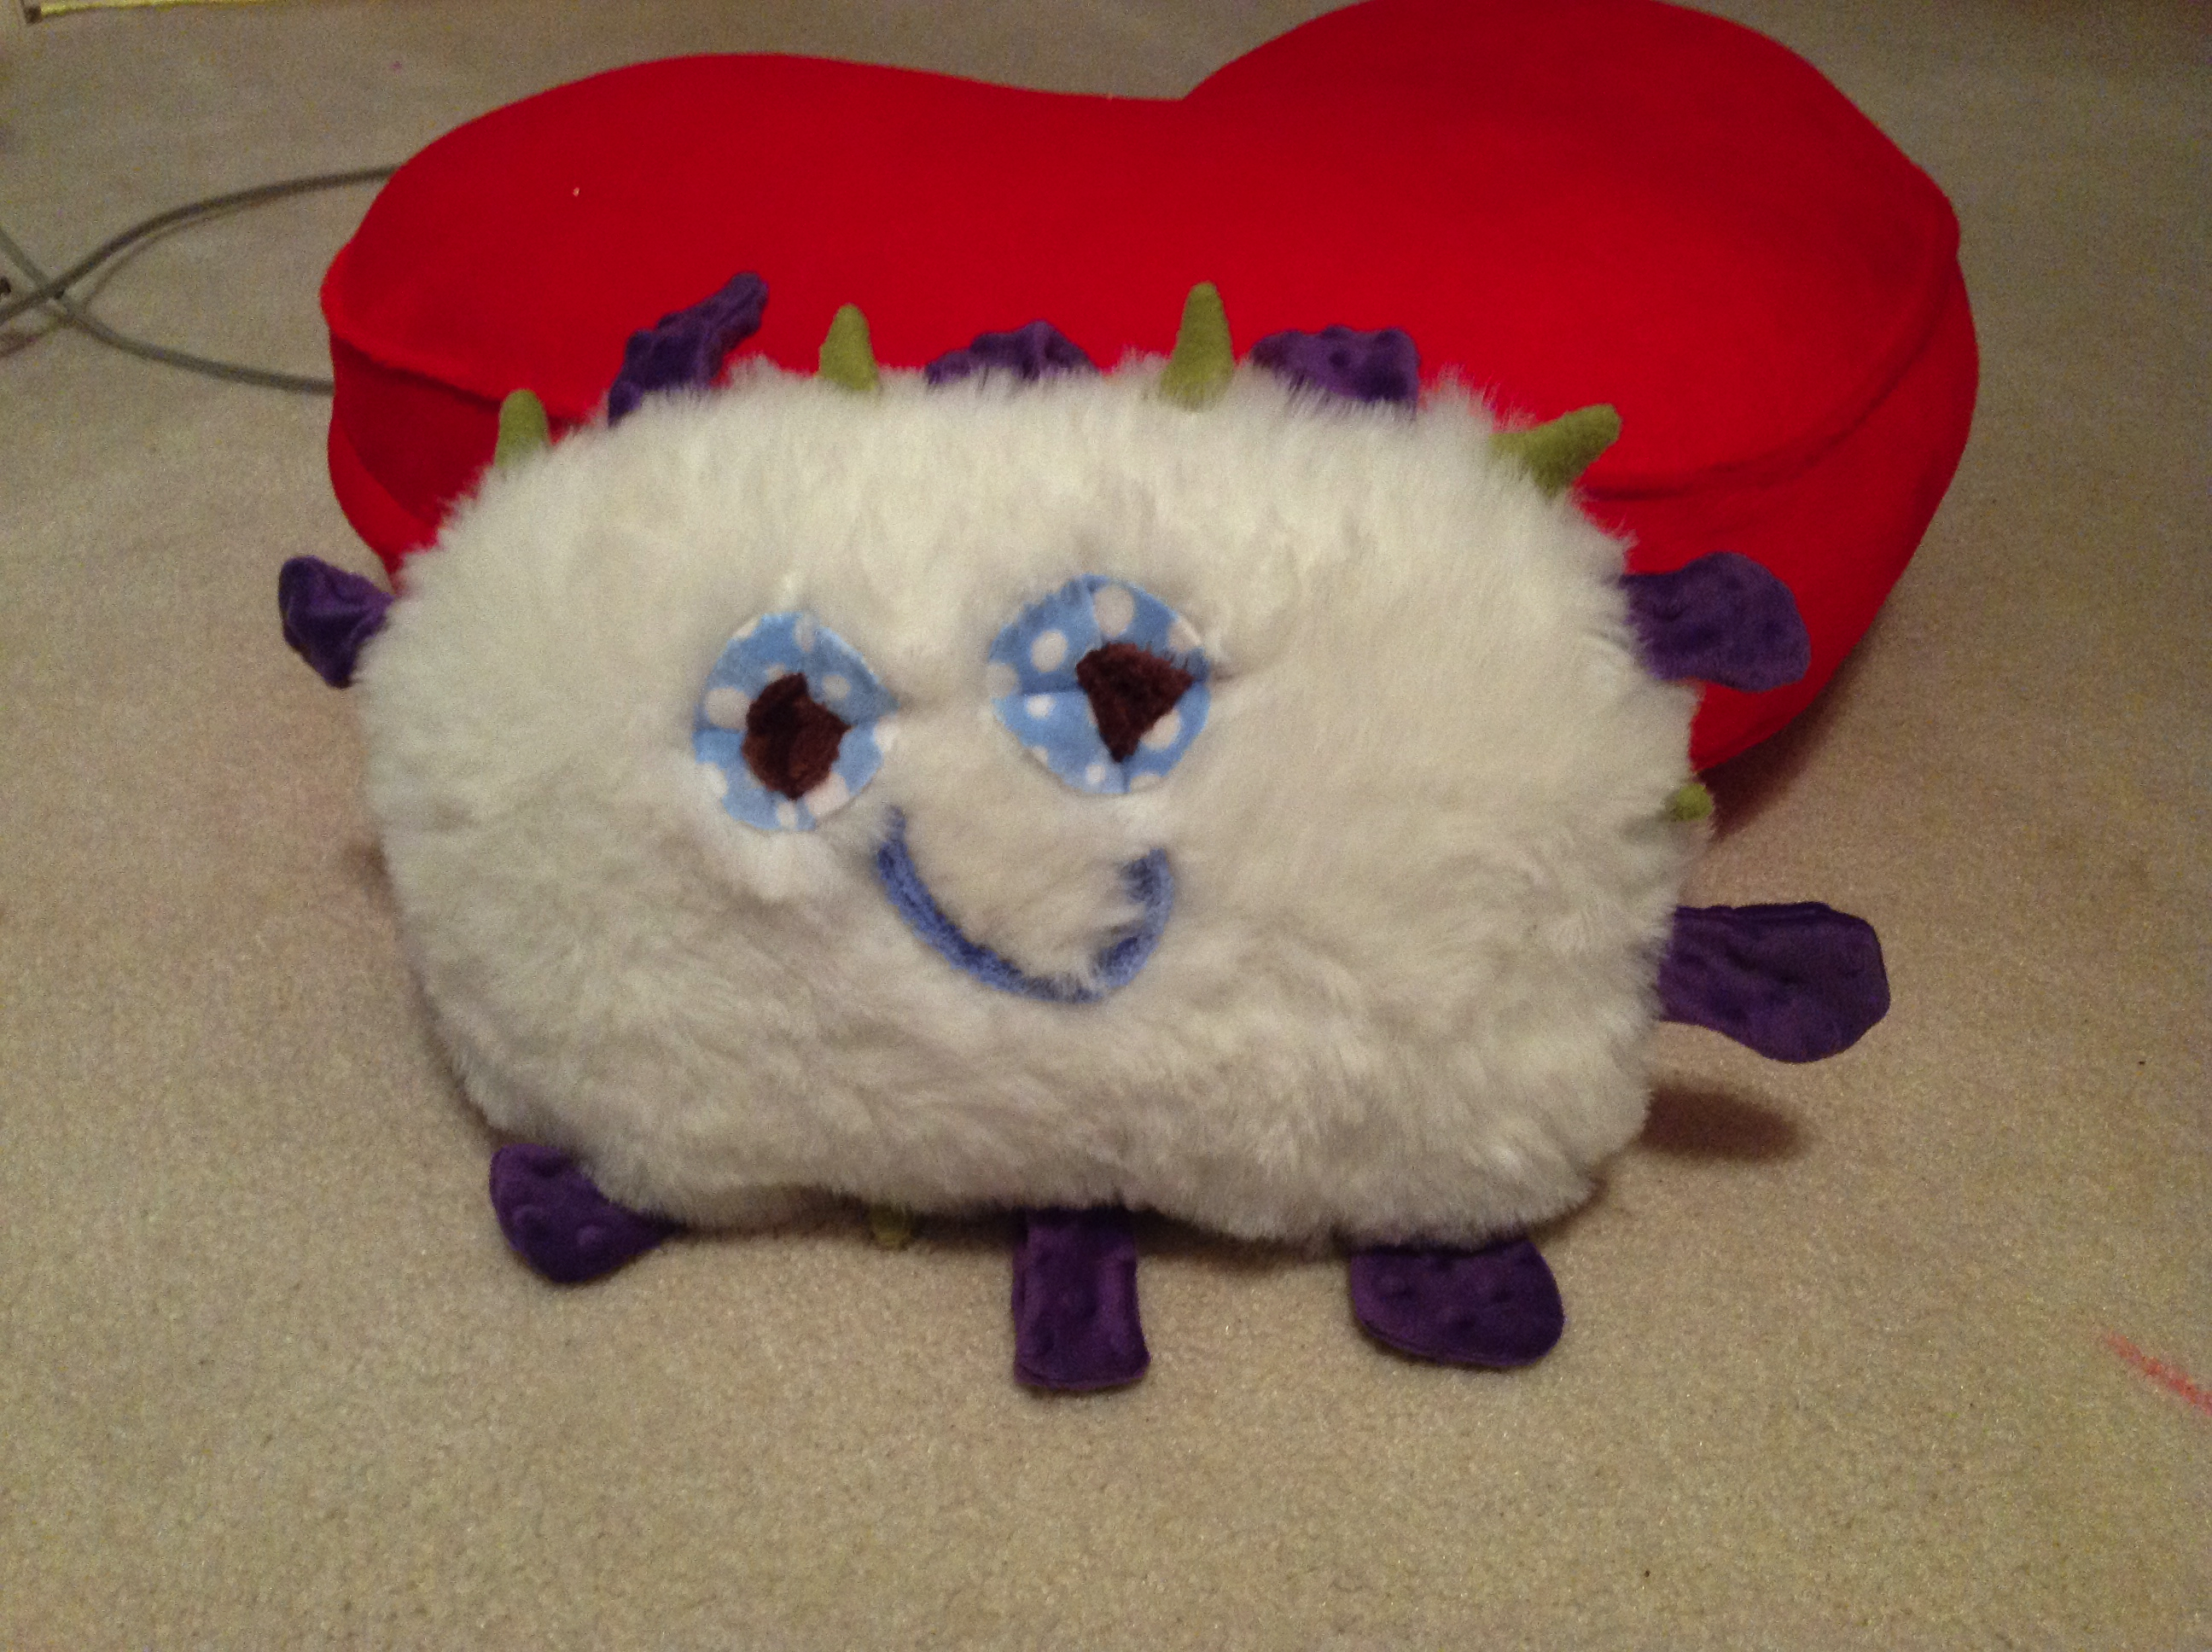
Last week I gave him a pile of fabric and told him to think about what he wanted to make with it. The next day he showed me the pattern he created for a a stuffed germ that he dubbed “Blanketitis” (since it was made with blanket material, get it?).
Pattern for Stuffed Germ
This was another fun and easy softie to make. I did the sewing, he did the stuffing and made all the creative decisions. He wants to make a whole line of stuffed germs, so we’ll have to see what he comes up with next!
It’s been awhile, but I haven’t forgotten about you! Hopefully, I can get back to a more regular posting schedule. I am doing plenty of projects, just haven’t had the time to show them off.
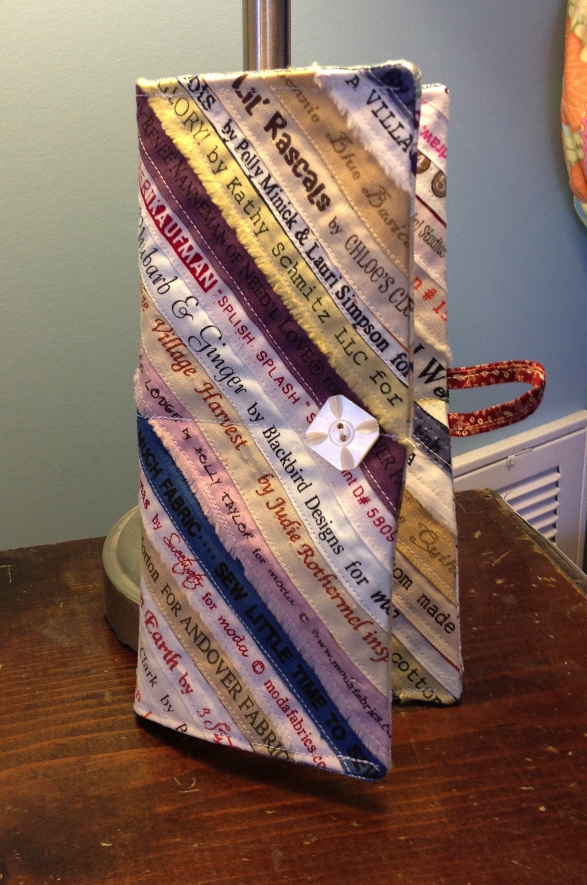
This is a little pin cushion and a needle case made from selvages. I must admit,this is kind of addicting and the possibilities are endless once you have the basic selvage blocks completed. The needle case pattern from a book called Save the Selvages. The book contains all kinds of small projects you can make in just few hours.
Here’s a pattern for what the book called a tea bag holder, but I used it for a wallet and check book cover.
Start saving your selvages and see what you can make! Keep it Thimble!
The goal is to quilt for at least 20 minutes a day in the month of February. I am pleased to announce I will be joining her and her merry band in this commitment and hereby post my official statement:
I, Heather Chandler, who is drowning in UFOs am joining Quilting Hottie Haven’s second annual DaGMT event, and pledge to quilt for 20 minutes every day of the month of February, 2013. In doing so I hope to clear out my sewing room so I can start another round of unfinished projects. I also want to thank Beth Helfter (THE Quilting Hottie) for coming up with this brilliant concept and inspiring me to join.
I’ve already put together a list of what I hope to finish. It is very ambitious, but if I complete at least four things on this list, I will consider it a HUGE success. I will tyr to post regular progress reports each week. In no particular order, the projects are:
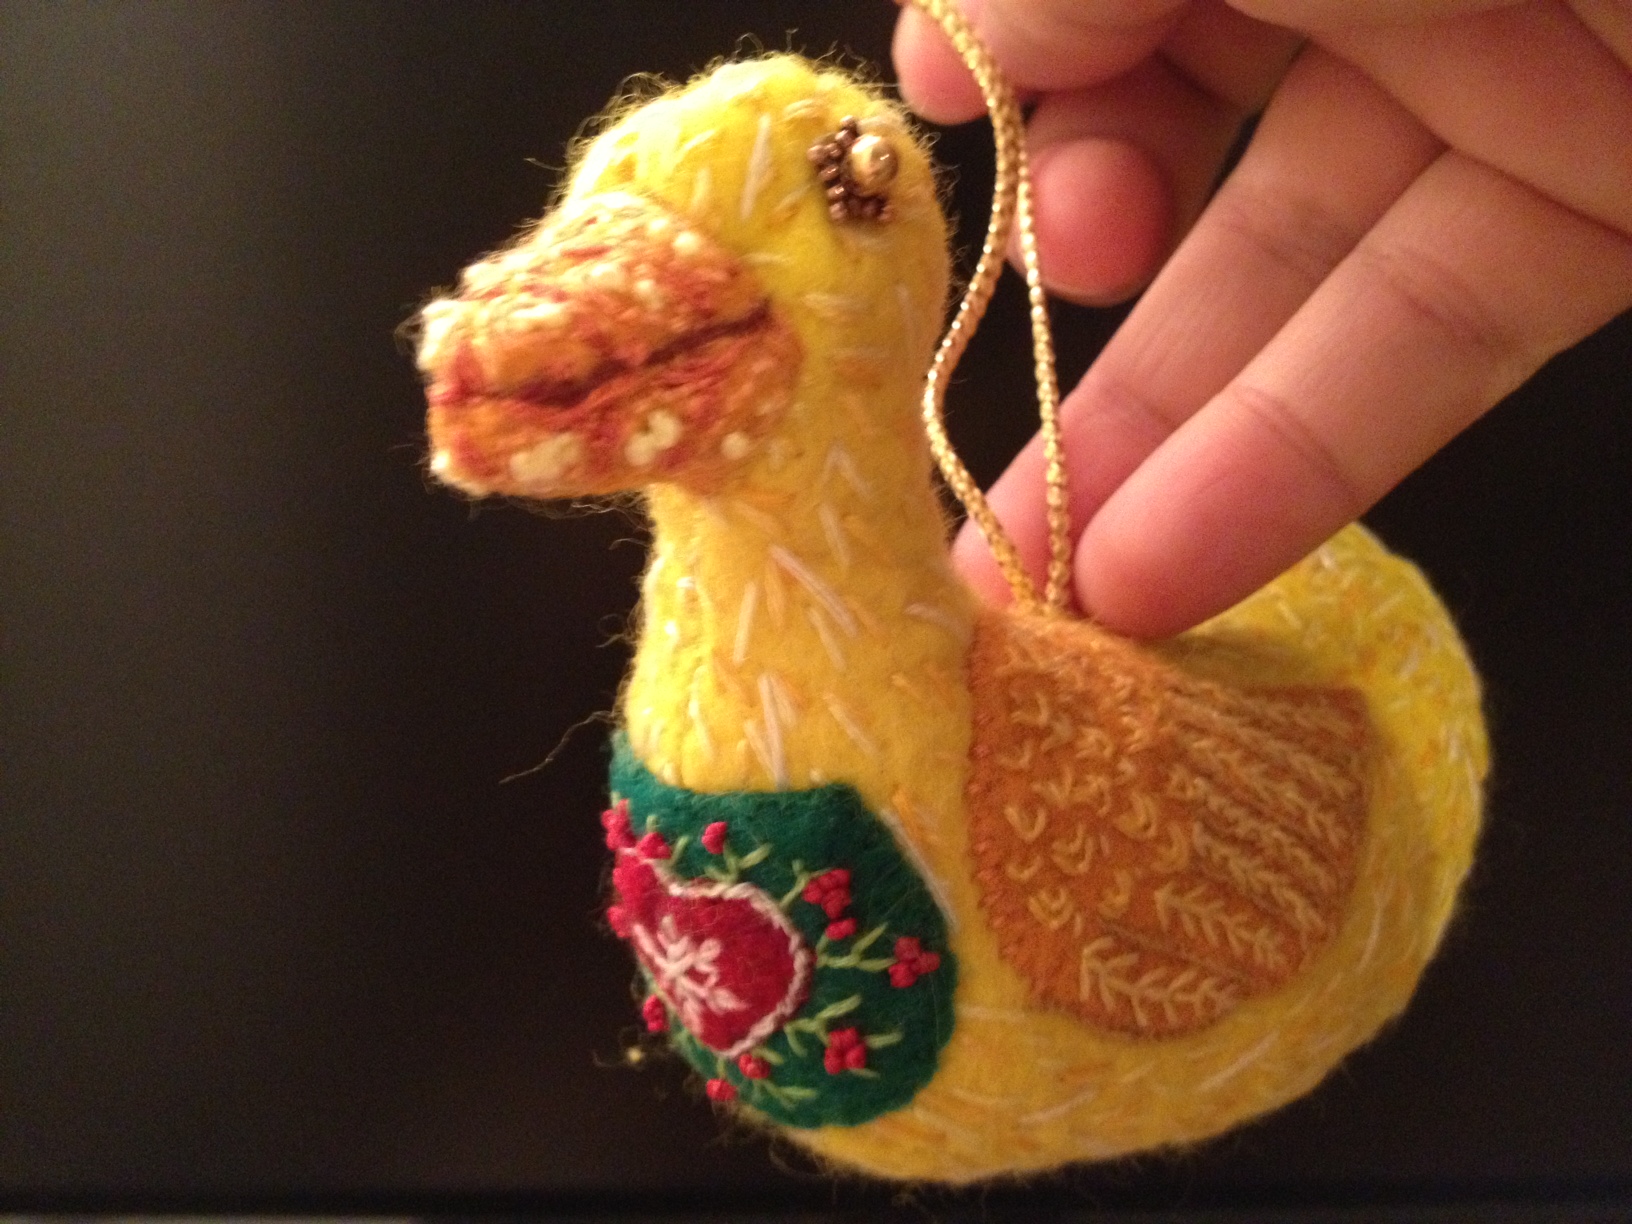
My friend Jen just sent me photos of this adorable duck ornament she made for her child’s teacher.
Wool Duck Ornament by Jen
I asked Jen to tell me about her process:
“Sure! I made it from this pattern http://noseynest.blogspot.com/2008/06/lucky-ducky-freebie.html but I turned it inside out to hide the seams. I like the look of hidden seams better, but it made his head so small! Wasn’t thinking about that when I changed it though. It’s just on regular wool felt, and before sewing it together I used embroidery thread to stitch on the decorative stitches.
Detail of Wing on Wool Duck Ornament
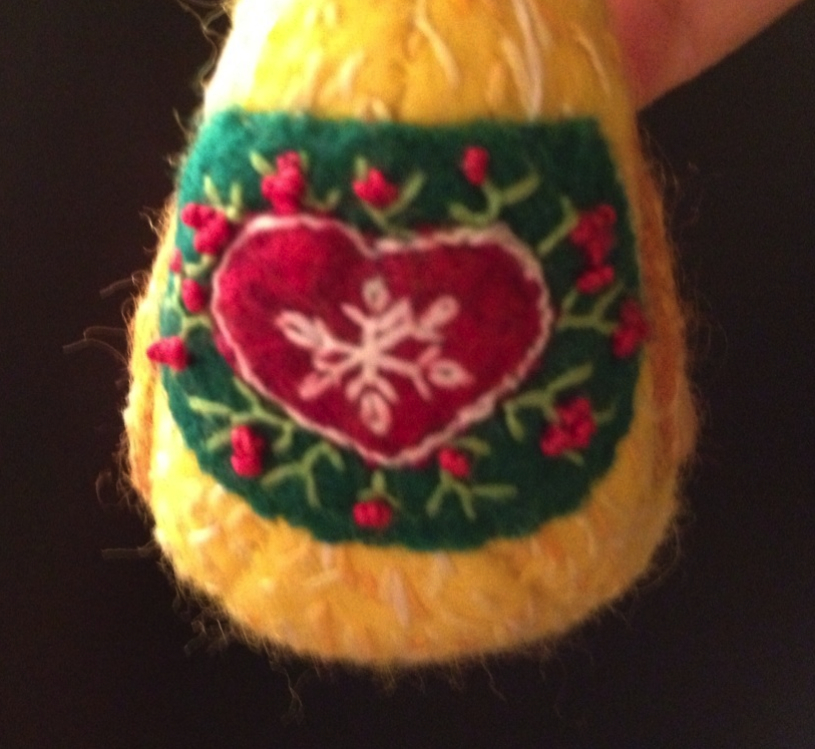
I used a straight stitch for the downy body, fly stitches for the feathers on the wings, buttonhole stiches to outline the wings and french knots, outline stich and backstitch for the beak. Oh and fly stitch, laisy daisy and outline and french knot for the heart patch.
Detail on Wool Duck Ornament
Then I turned it inside out, stitched it, and stuffed it. It turned out a little wonky, to be honest, but I like the stitching effect and the cute little heart with holly berries. ”